
Introduction
If you are encountering ERROR 14 on your BTX Moto you may need to replace your throttle to resolve this. Follow the instructions here for steps on swapping this part!
You will need the following tools to perform this:
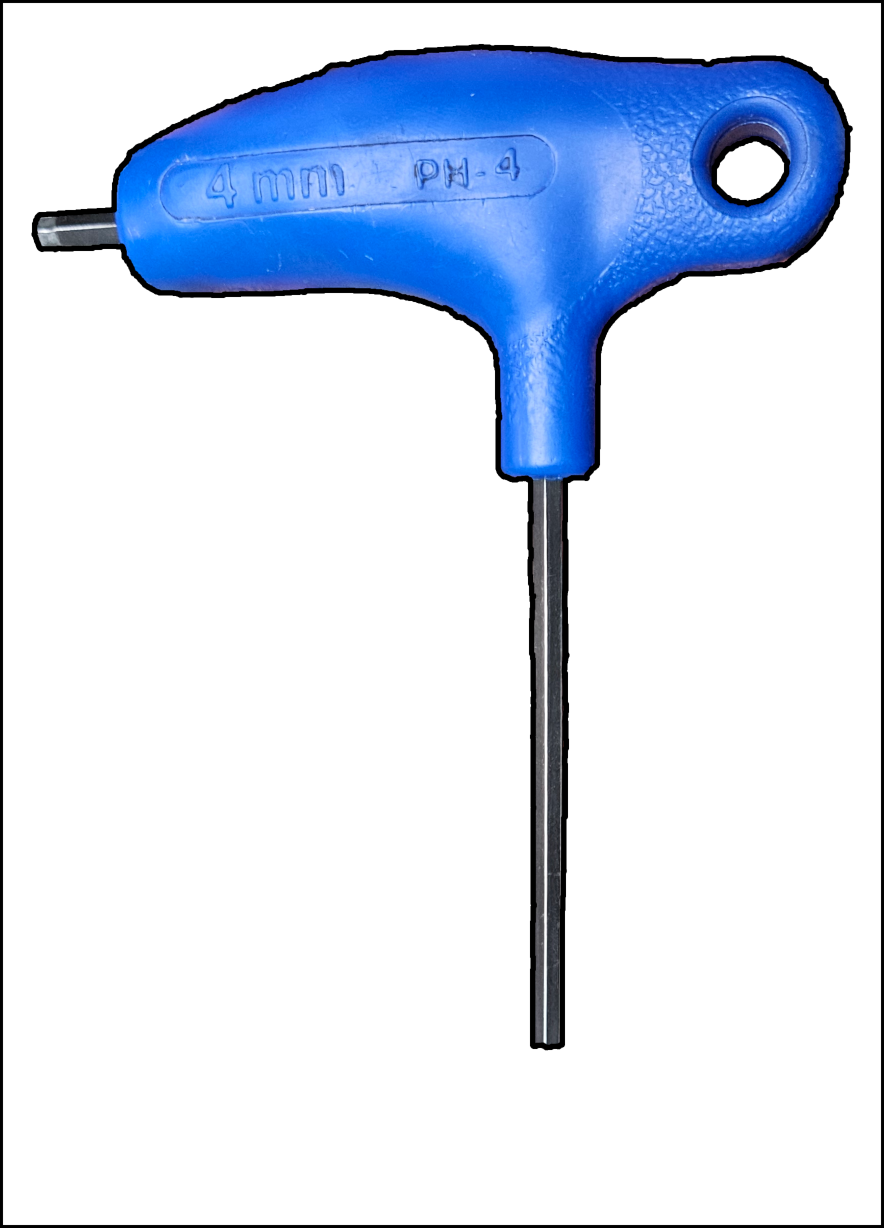
4mm Allen Key
BTX Moto Key to remove Battery
Continue to see the instructions on installing this new throttle.
Step 1
Remove the battery from your BTX Moto
With the battery removed, discharge excess electricity from the BTX Moto by inserting the key into the ignition and switching it to the "ON" Position until the beeps stop. Then turn off the ignition and remove the key.
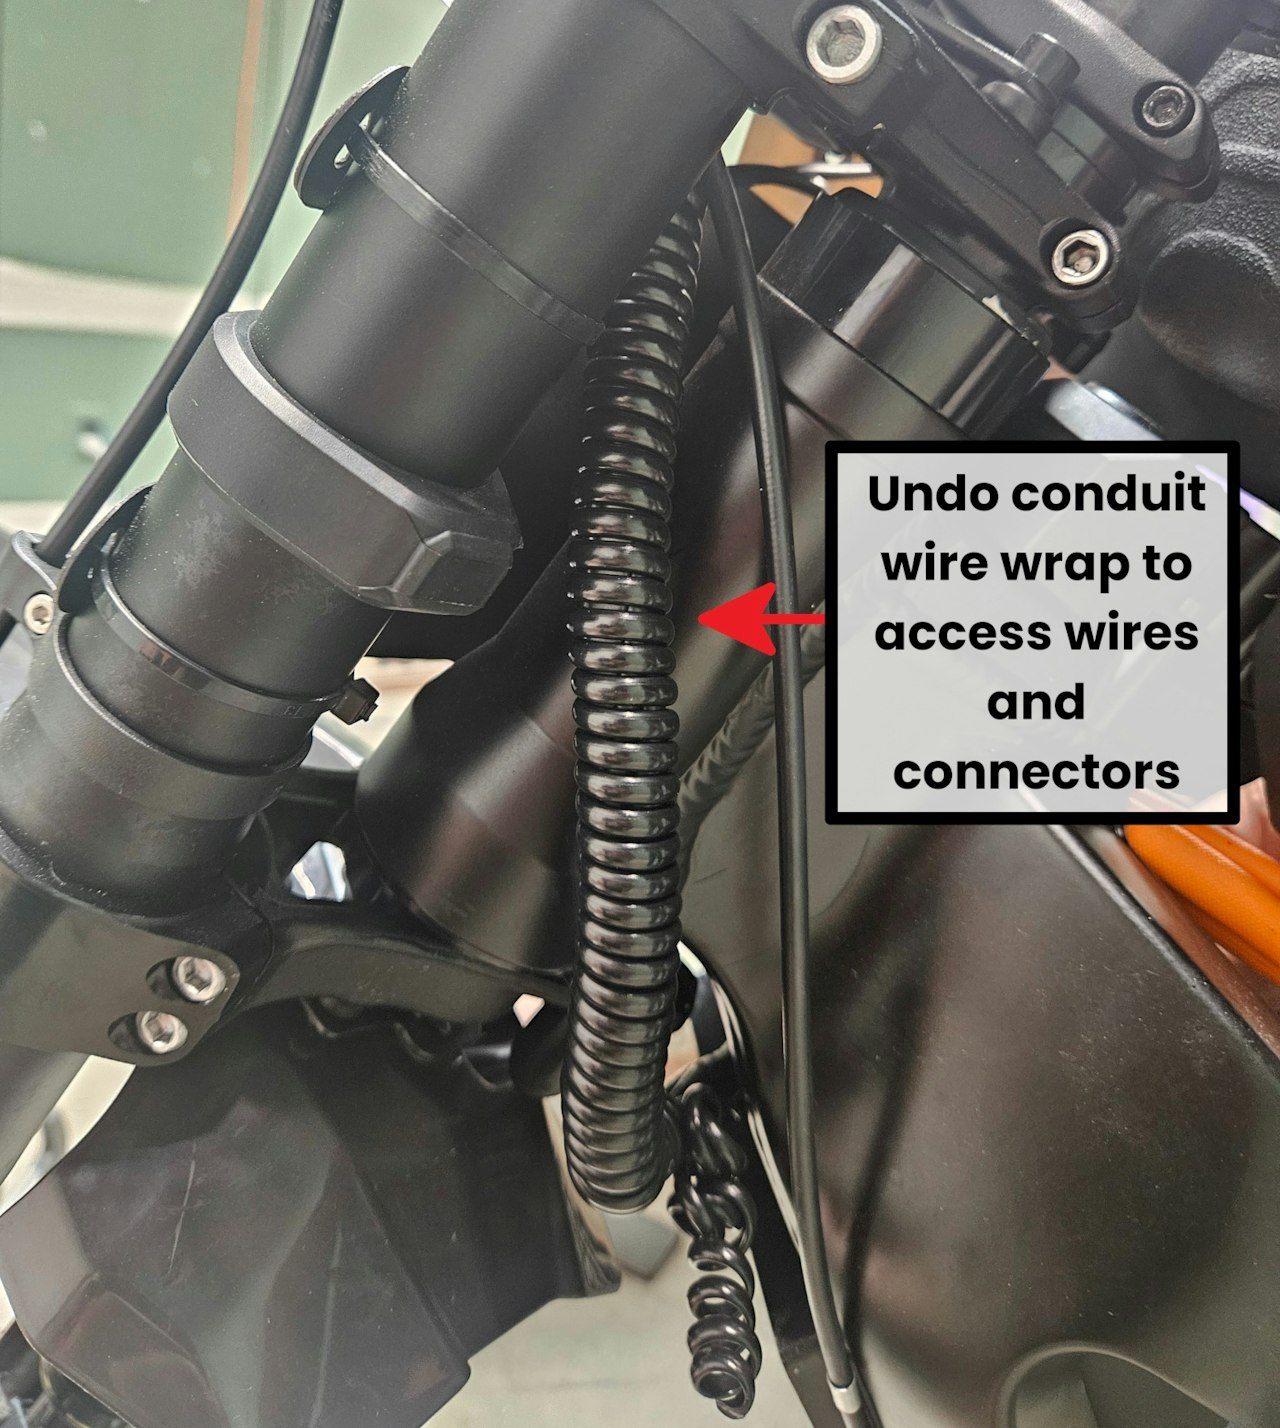
Undo the conduit on the wires from the handlebars to allow for further access to wires and connectors.

Step 2
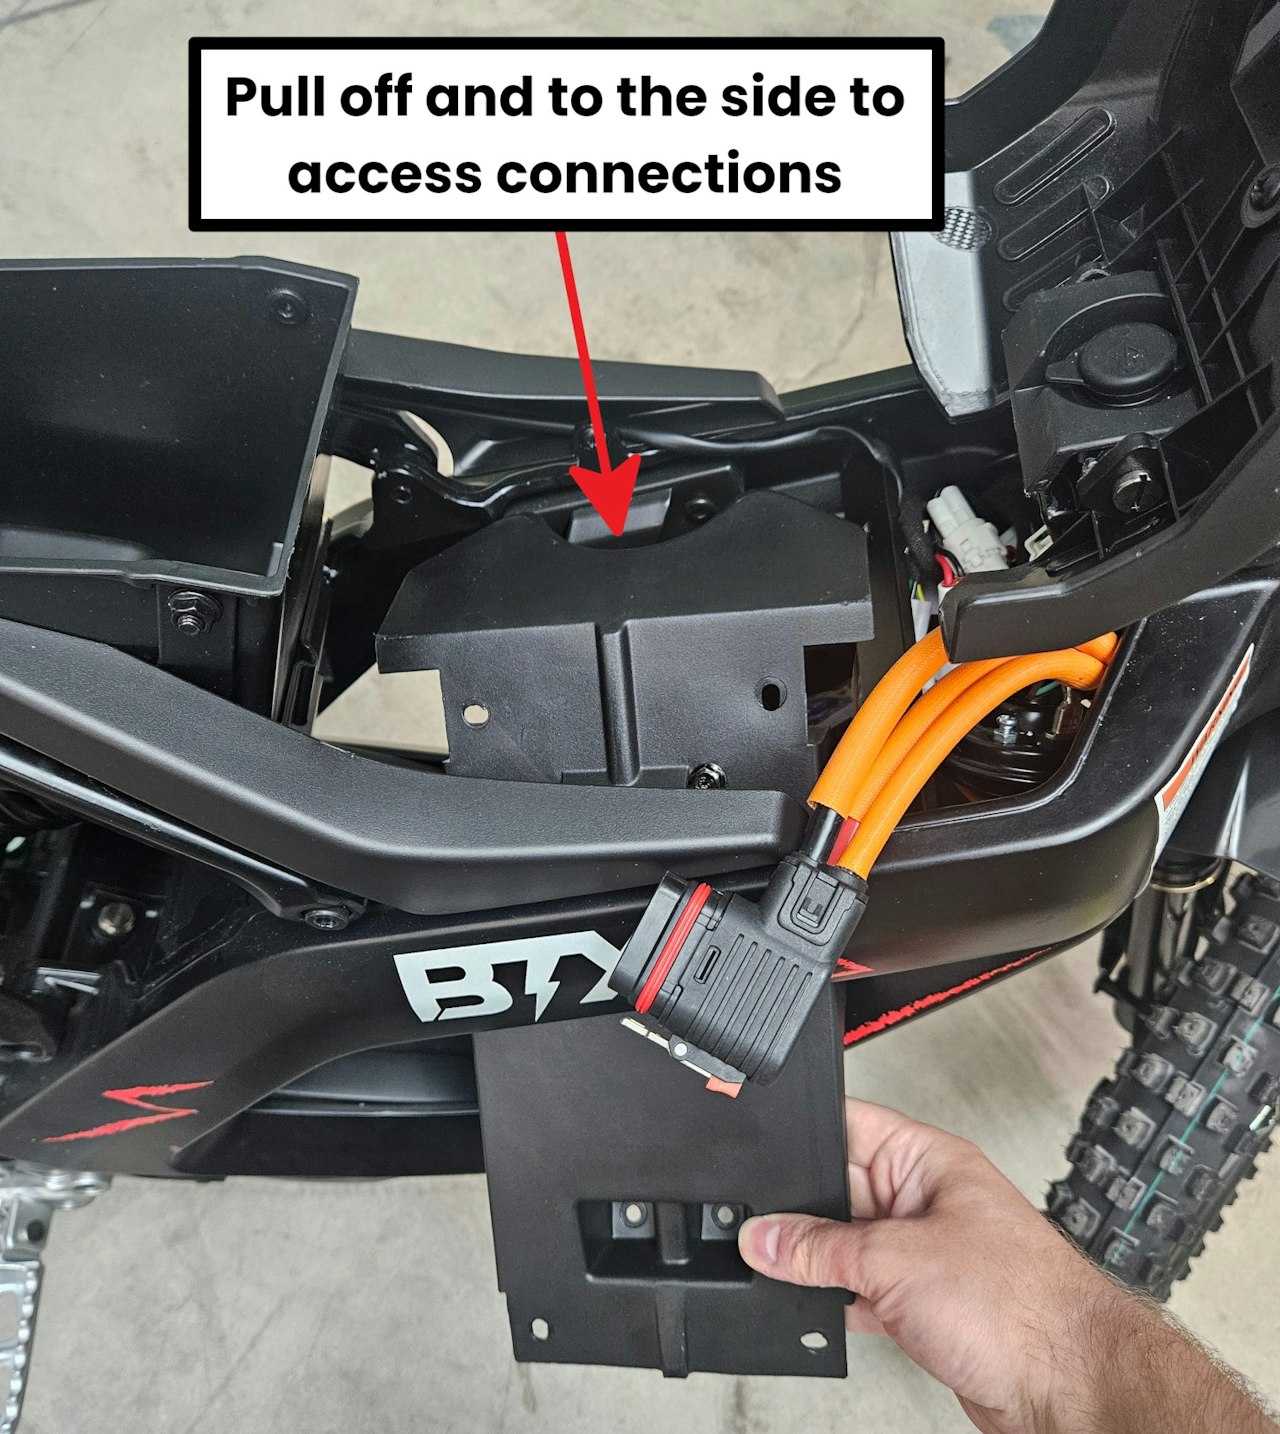
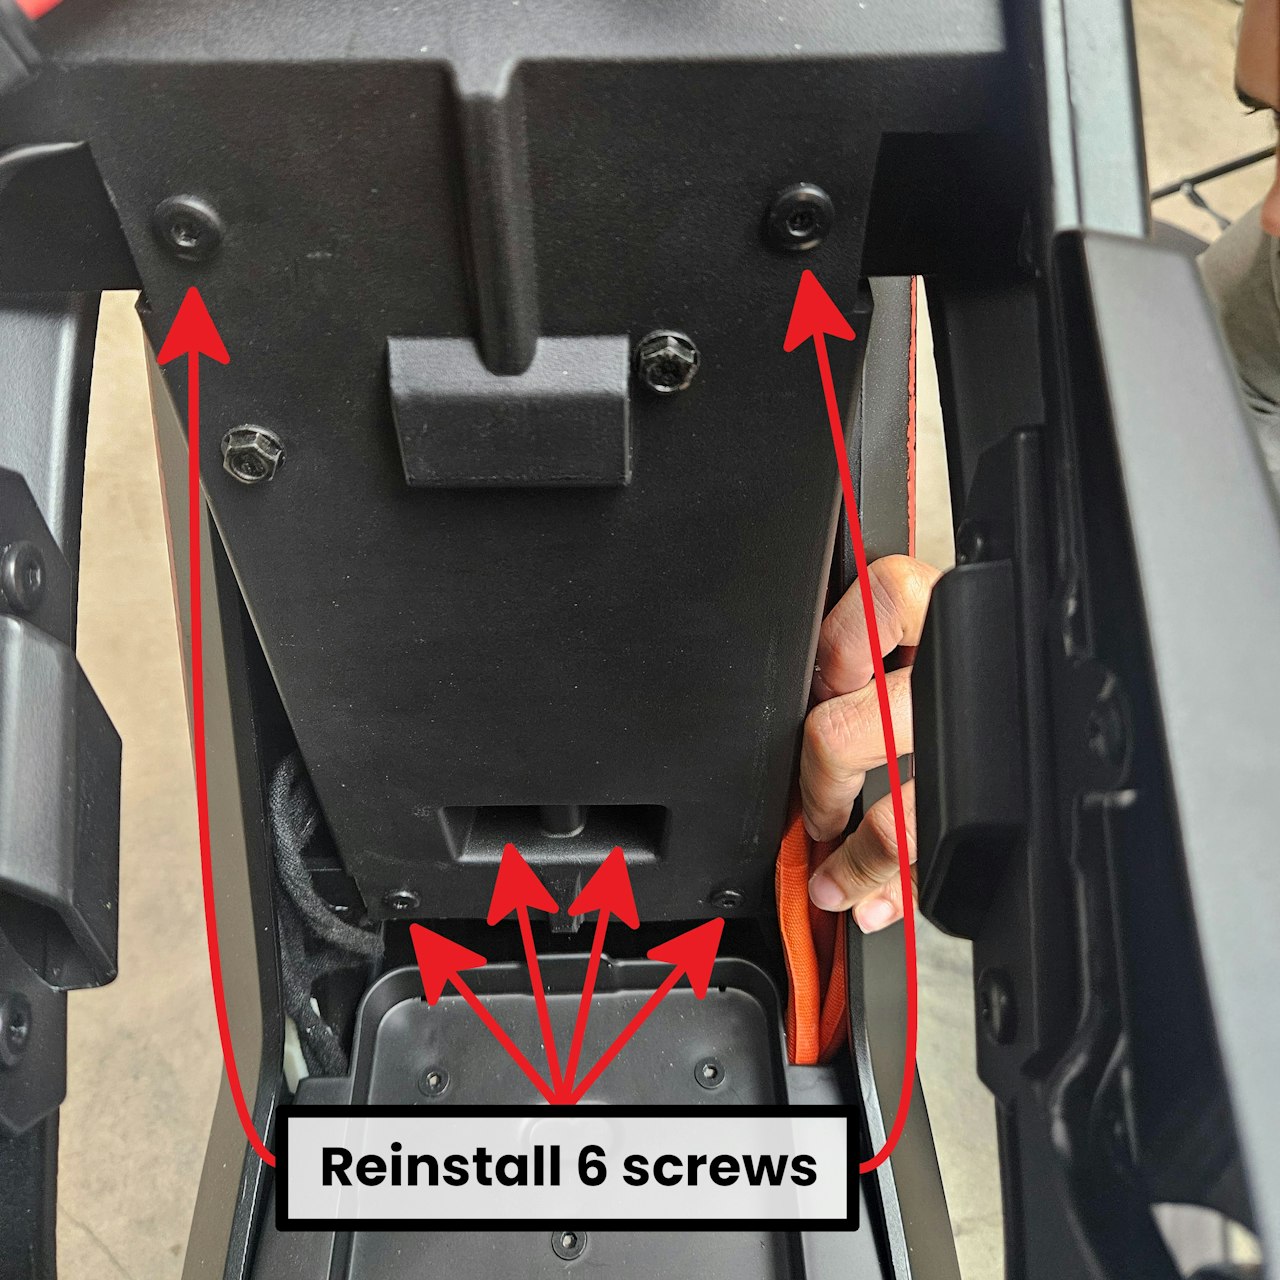
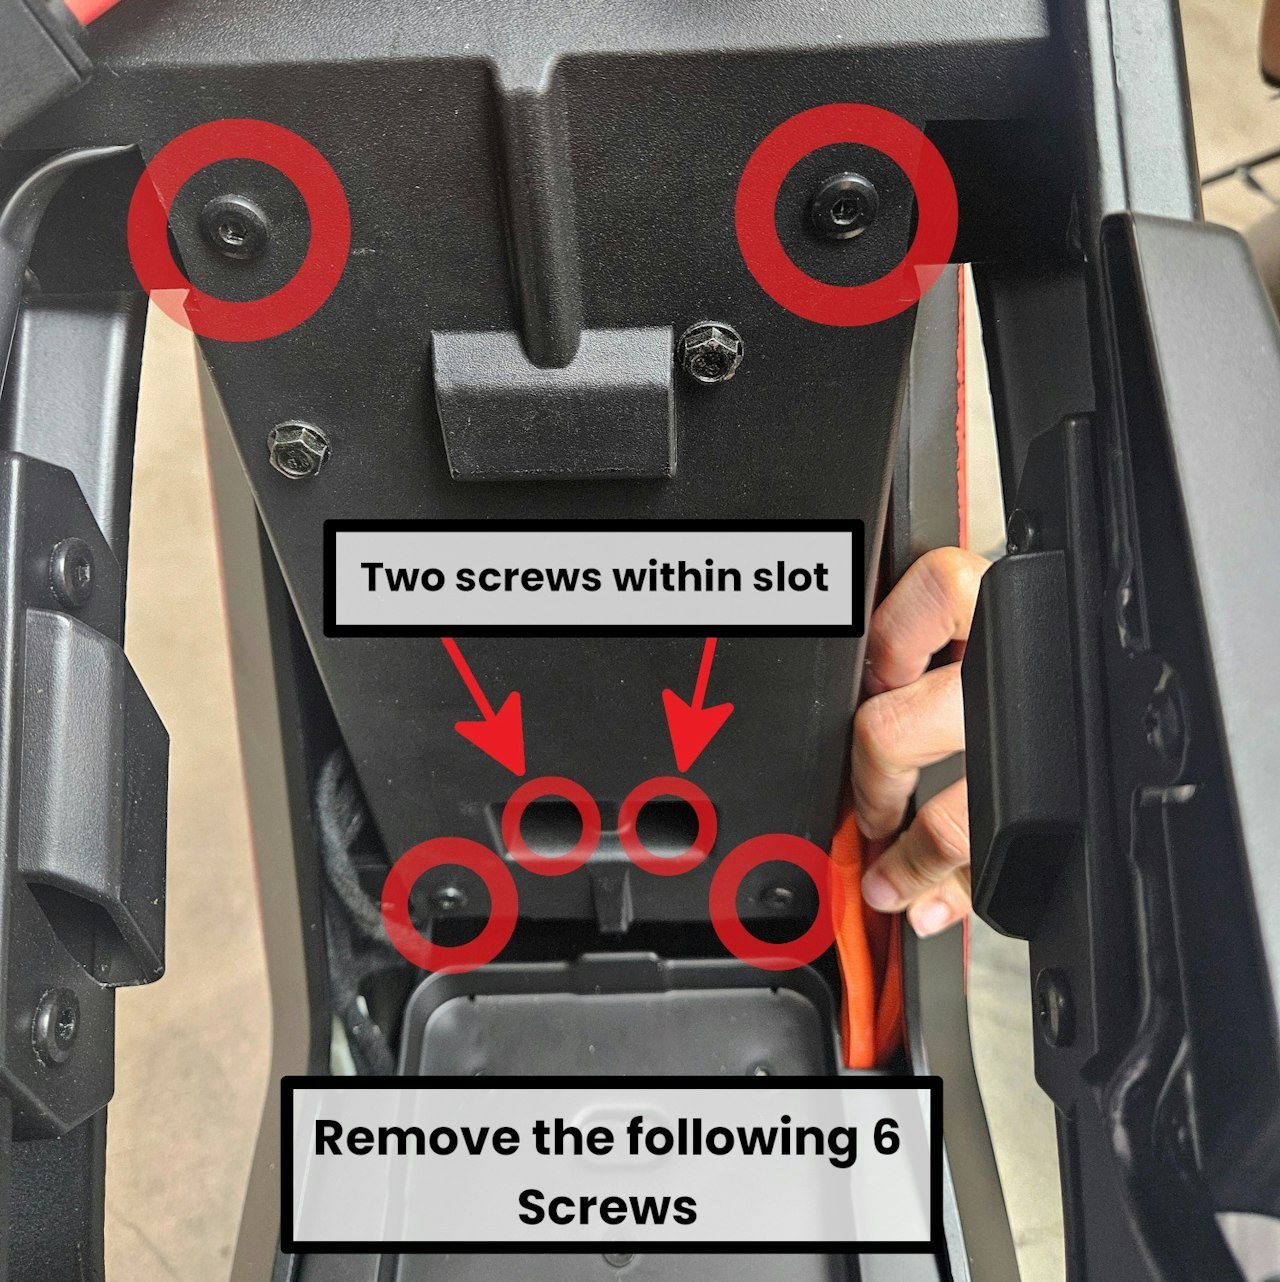
Remove the 6 circled screws from the controller/electronics cover with your 4mm Allen Key within the cavity where the battery in installed. Note that two screws are within the slots in the middle of the cover.
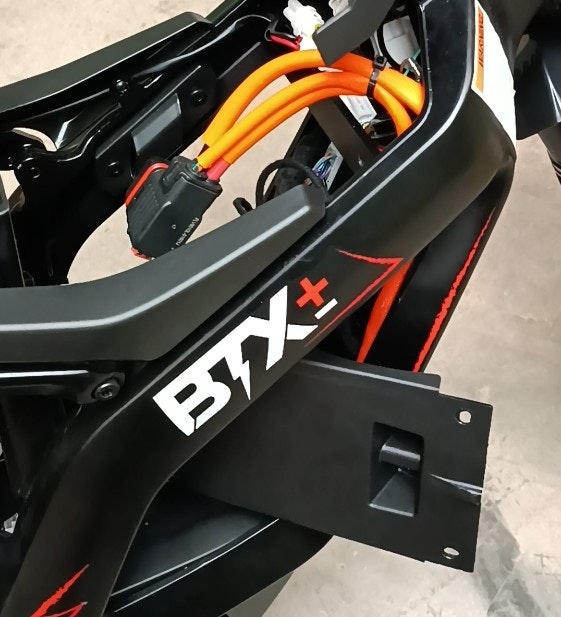
With the screws removed, pull the cover away to expose the connectors and electronics. It will be easiest to do work within this cavity by carefully angling the cover outside of the frame as demonstrated in the third image

Step 3
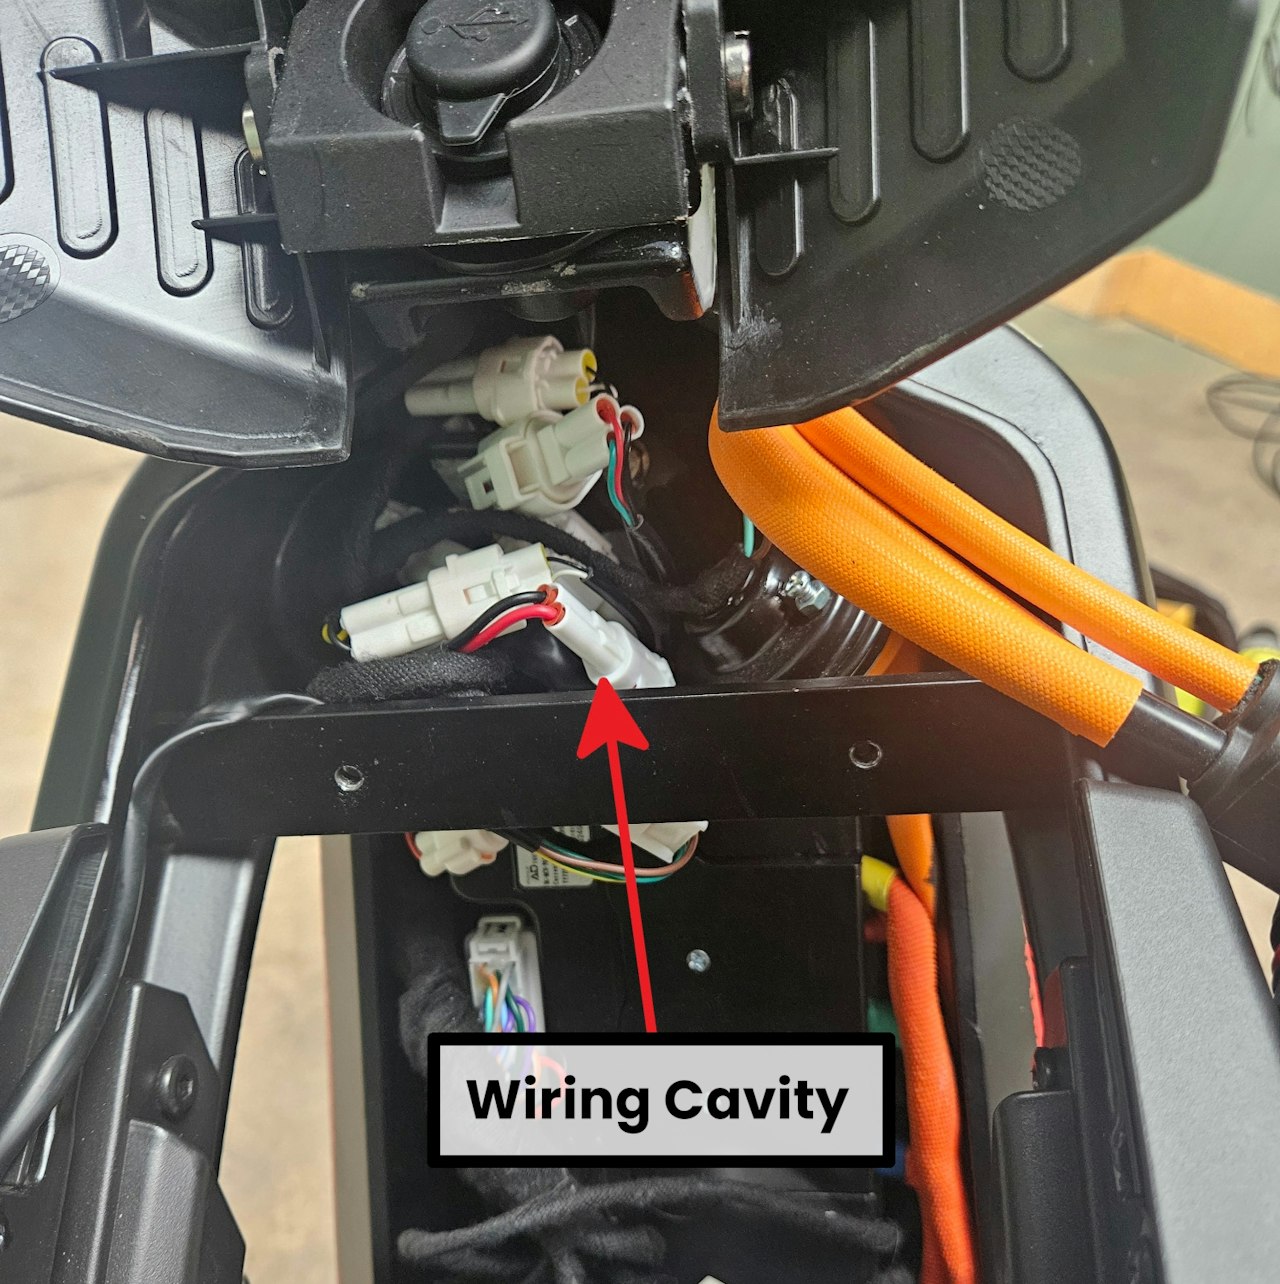
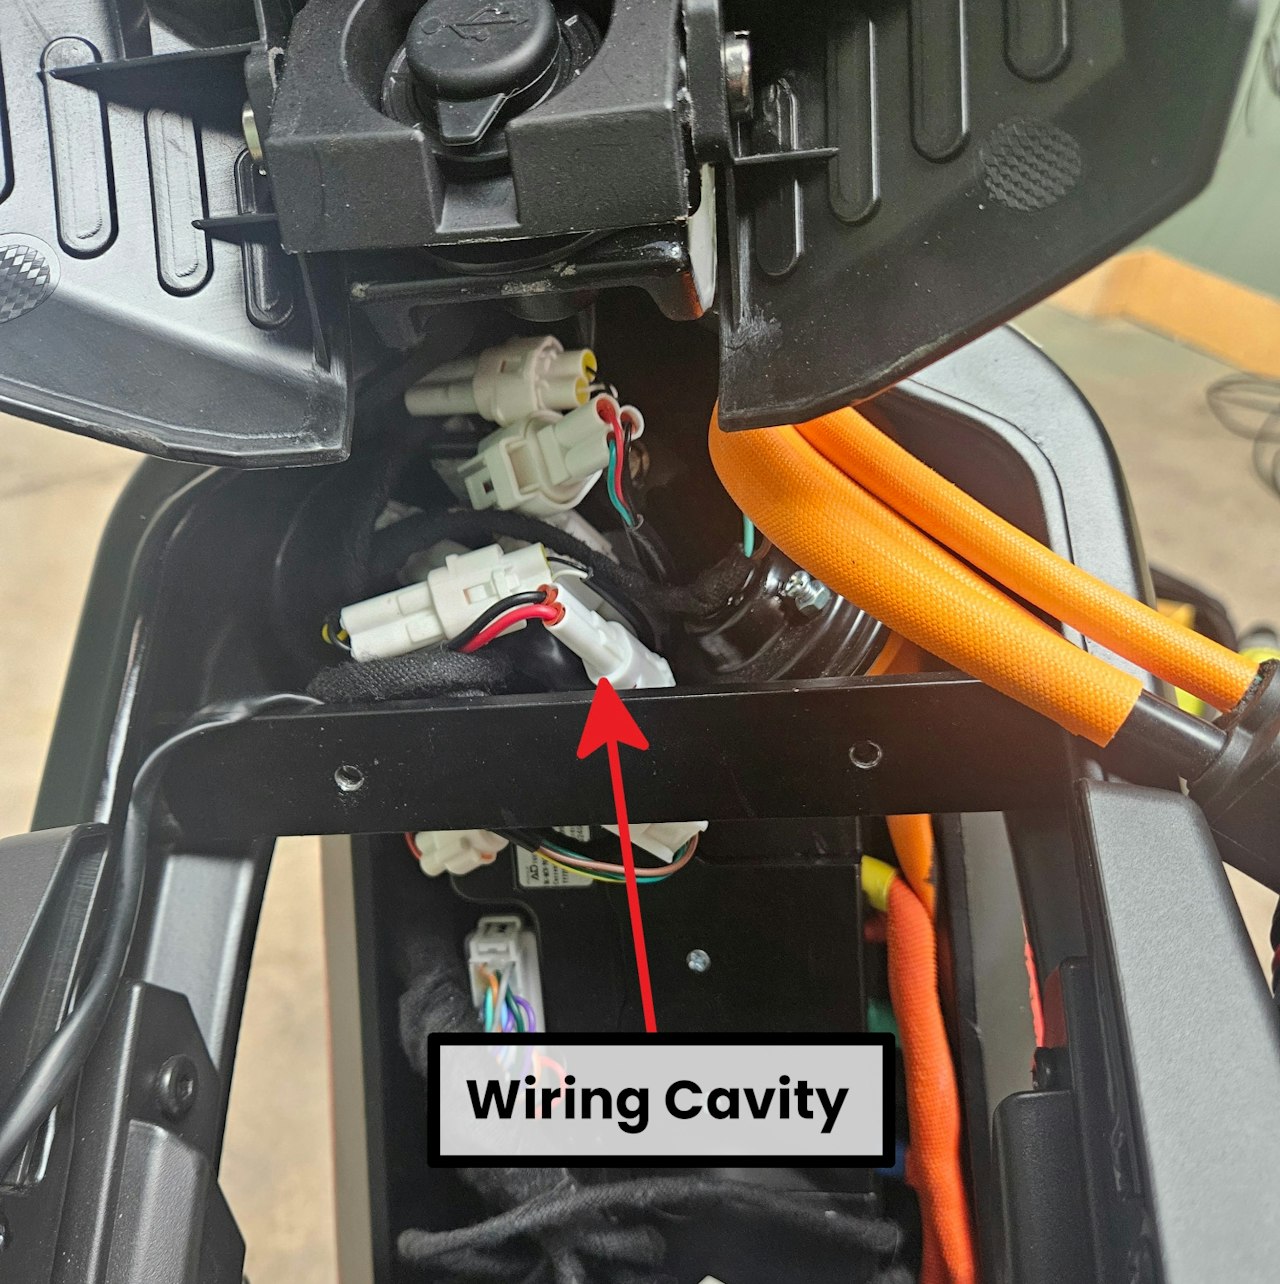
With the cover removed you now have fulla ccess to the wiring caivt yand all connectory
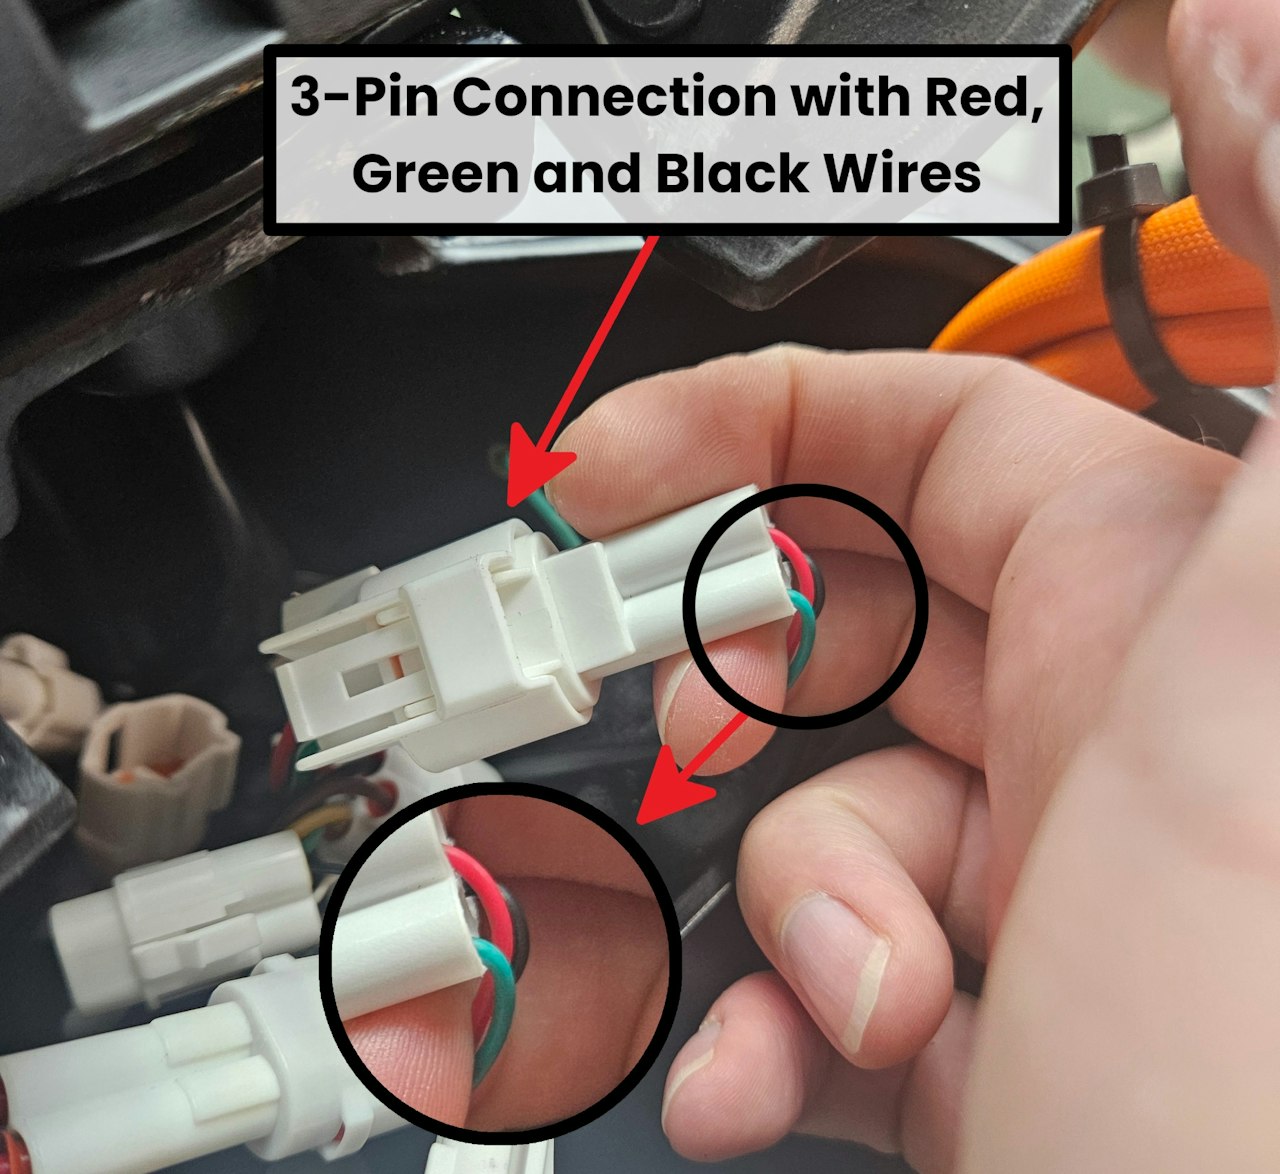
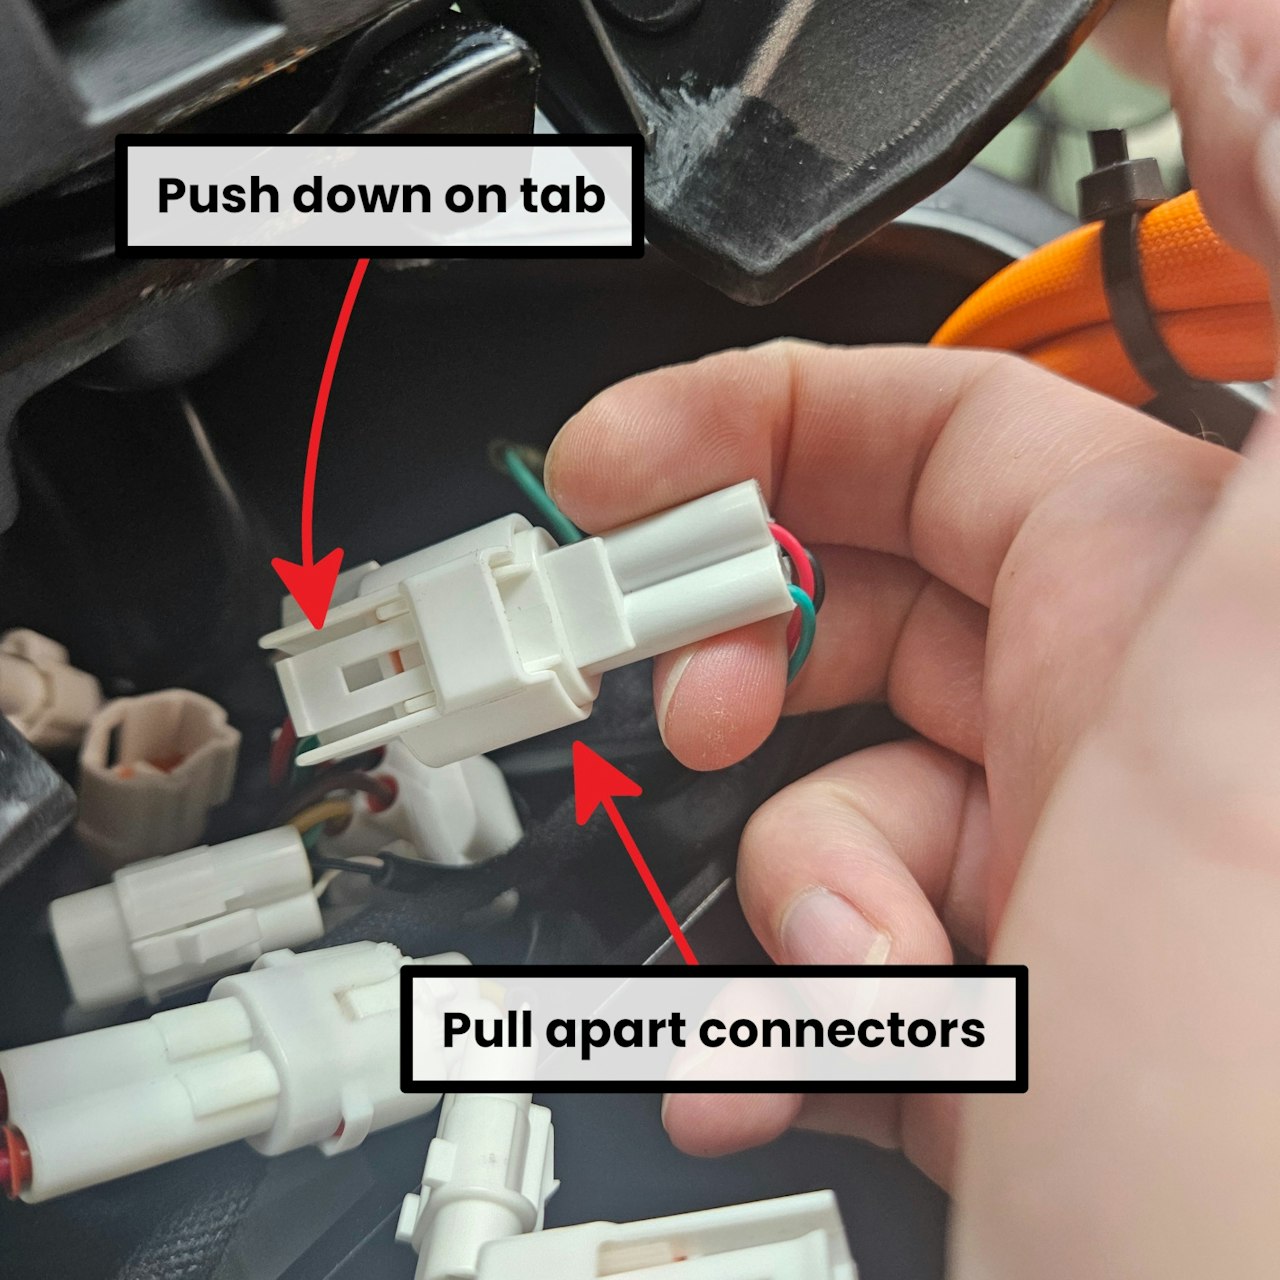
Lockte the 3-Pin connector with BLACK, RED and GREEN wires on both ends - this will be for the Throttle.
If you do not see a connector matching this trace the wires coming from the throttle into the cavity to find the appropriate connector.
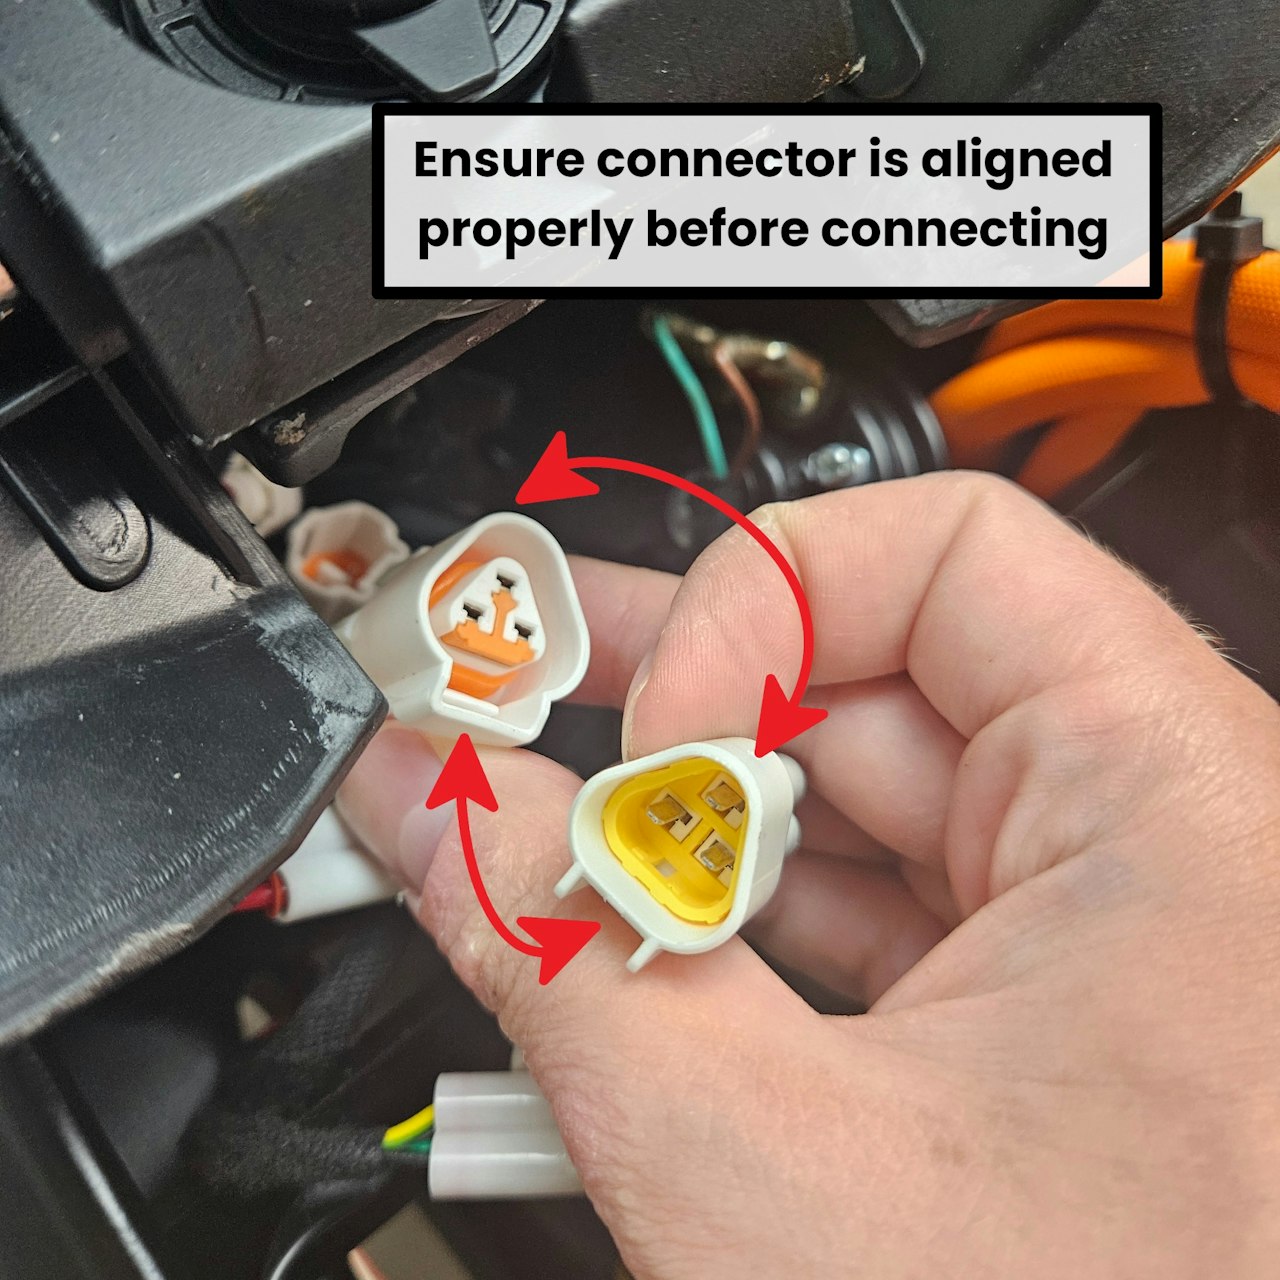
Unplug the connector by pressing on the tab and pulling the connector apart.

Step 4
Go to the handlebars. Loosen the two bolts on the brake lever with the 4mm Allen Key. Loosen these enough that you can slide the brake handle closer to the display and out of the way.
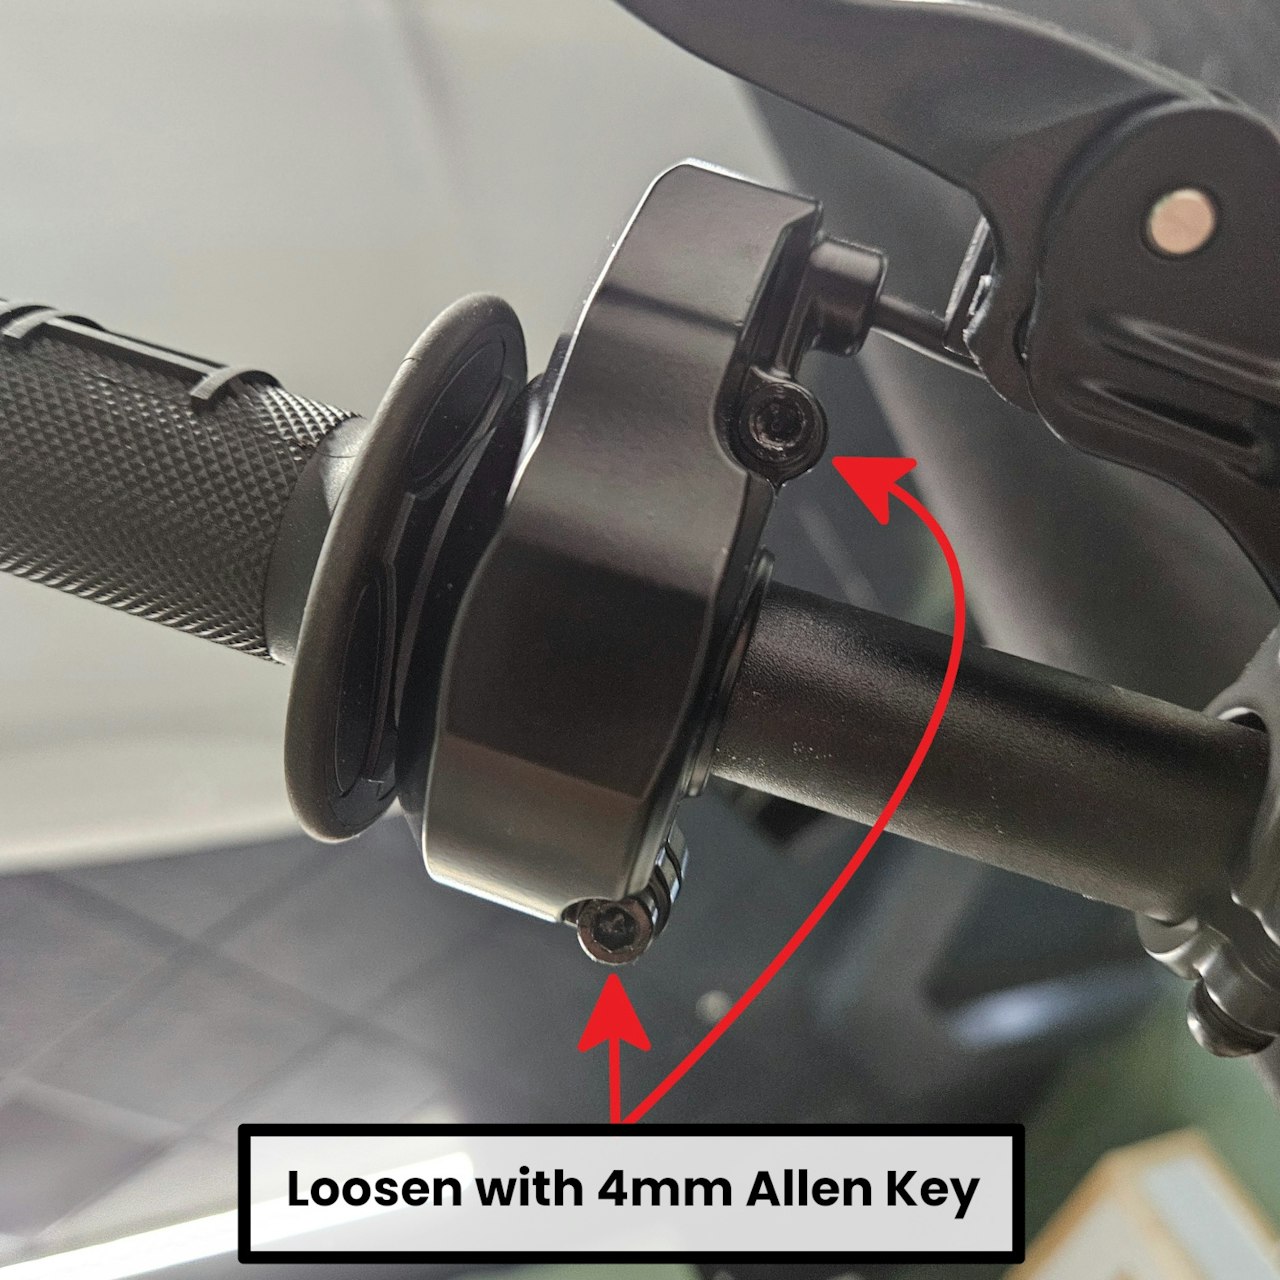
Loosen the two screws on the throttle from the second picture with the 4mm Allen Key. Just loosen these enough that the throttle can slide on the handlebars but do not remove the throttle yet!
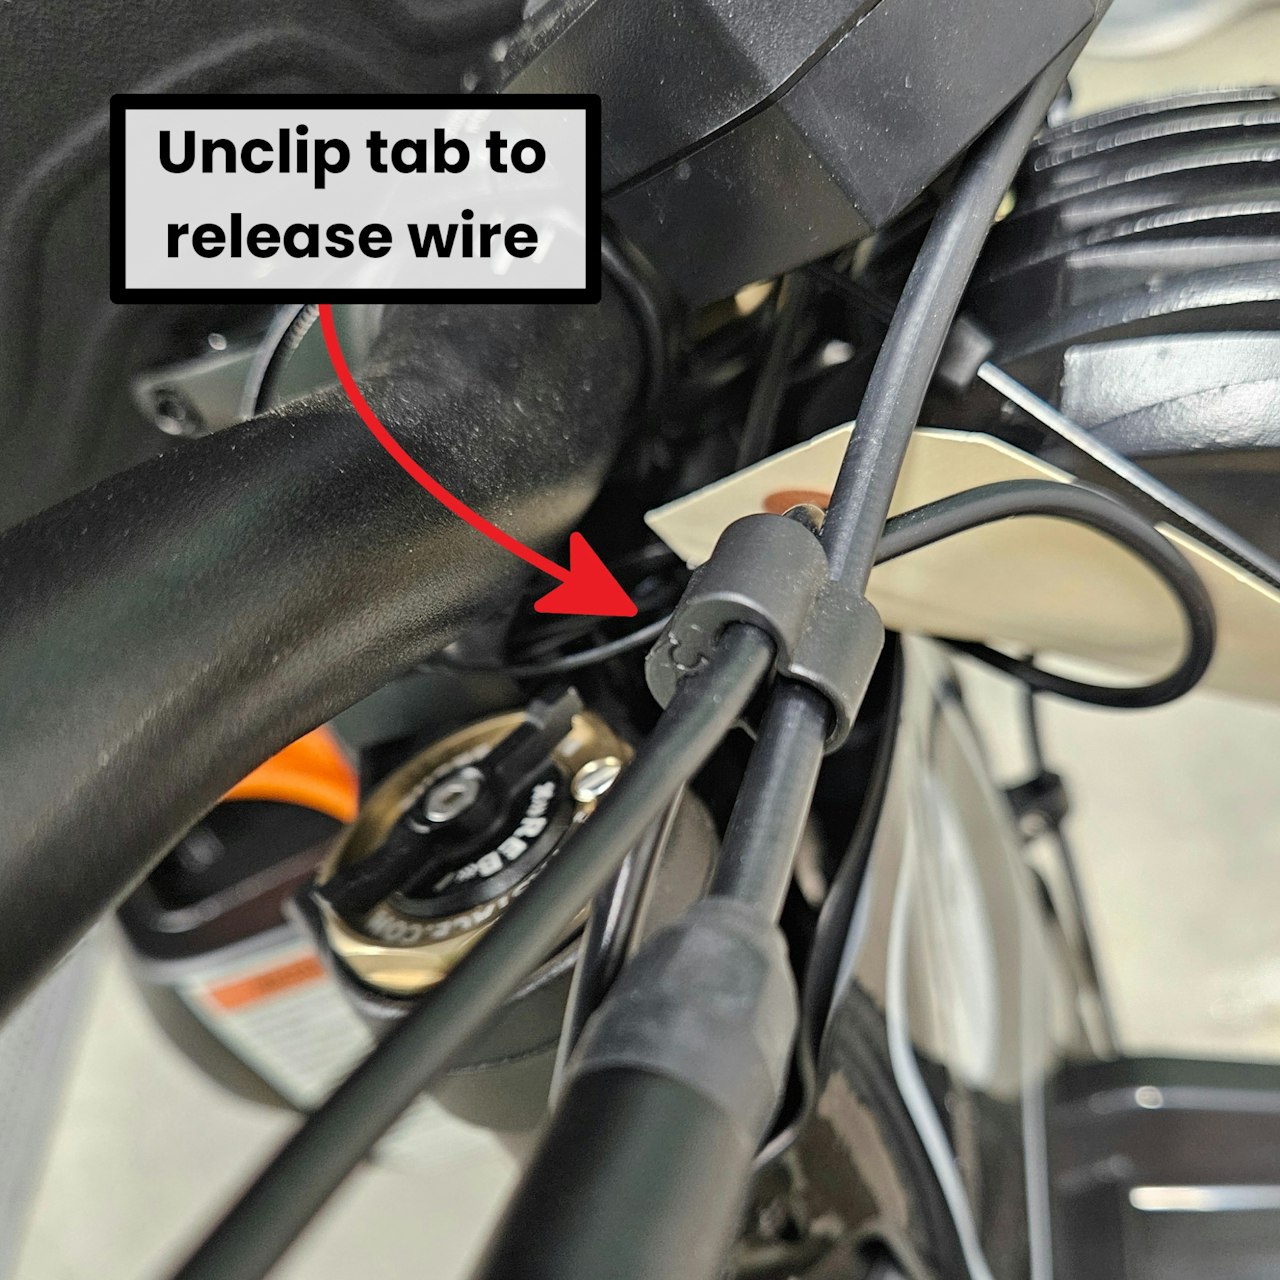
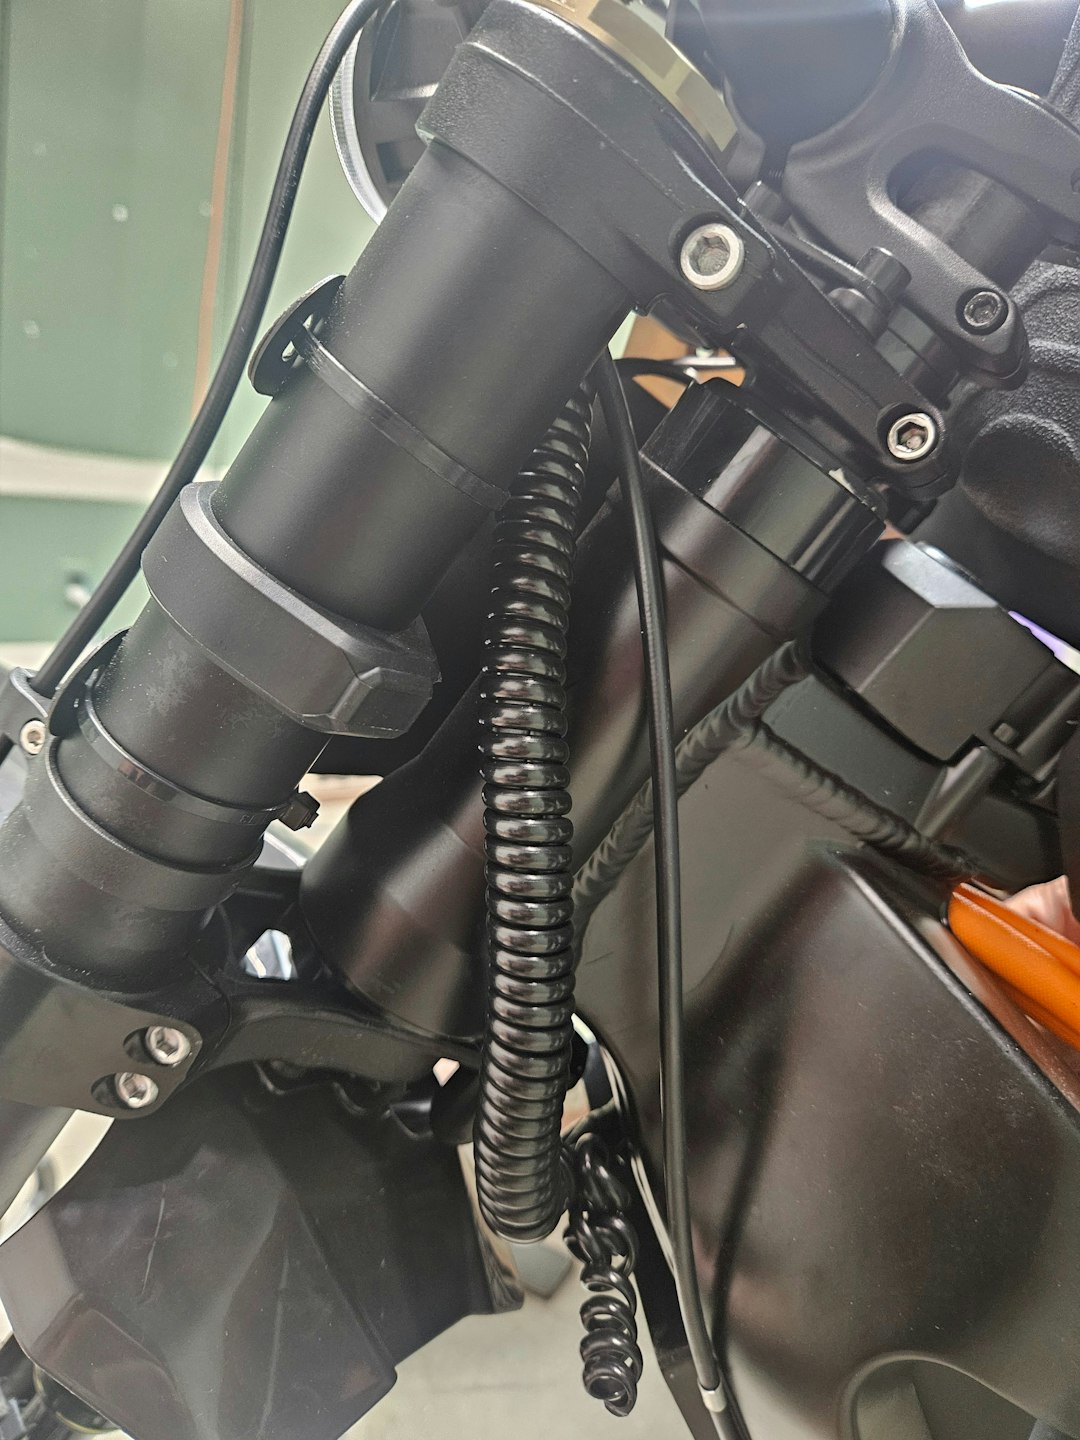
Unclip the tab shown in the third image holding the brake wires and throttle cable together using a small flathead screwdriver or pick.

Step 5
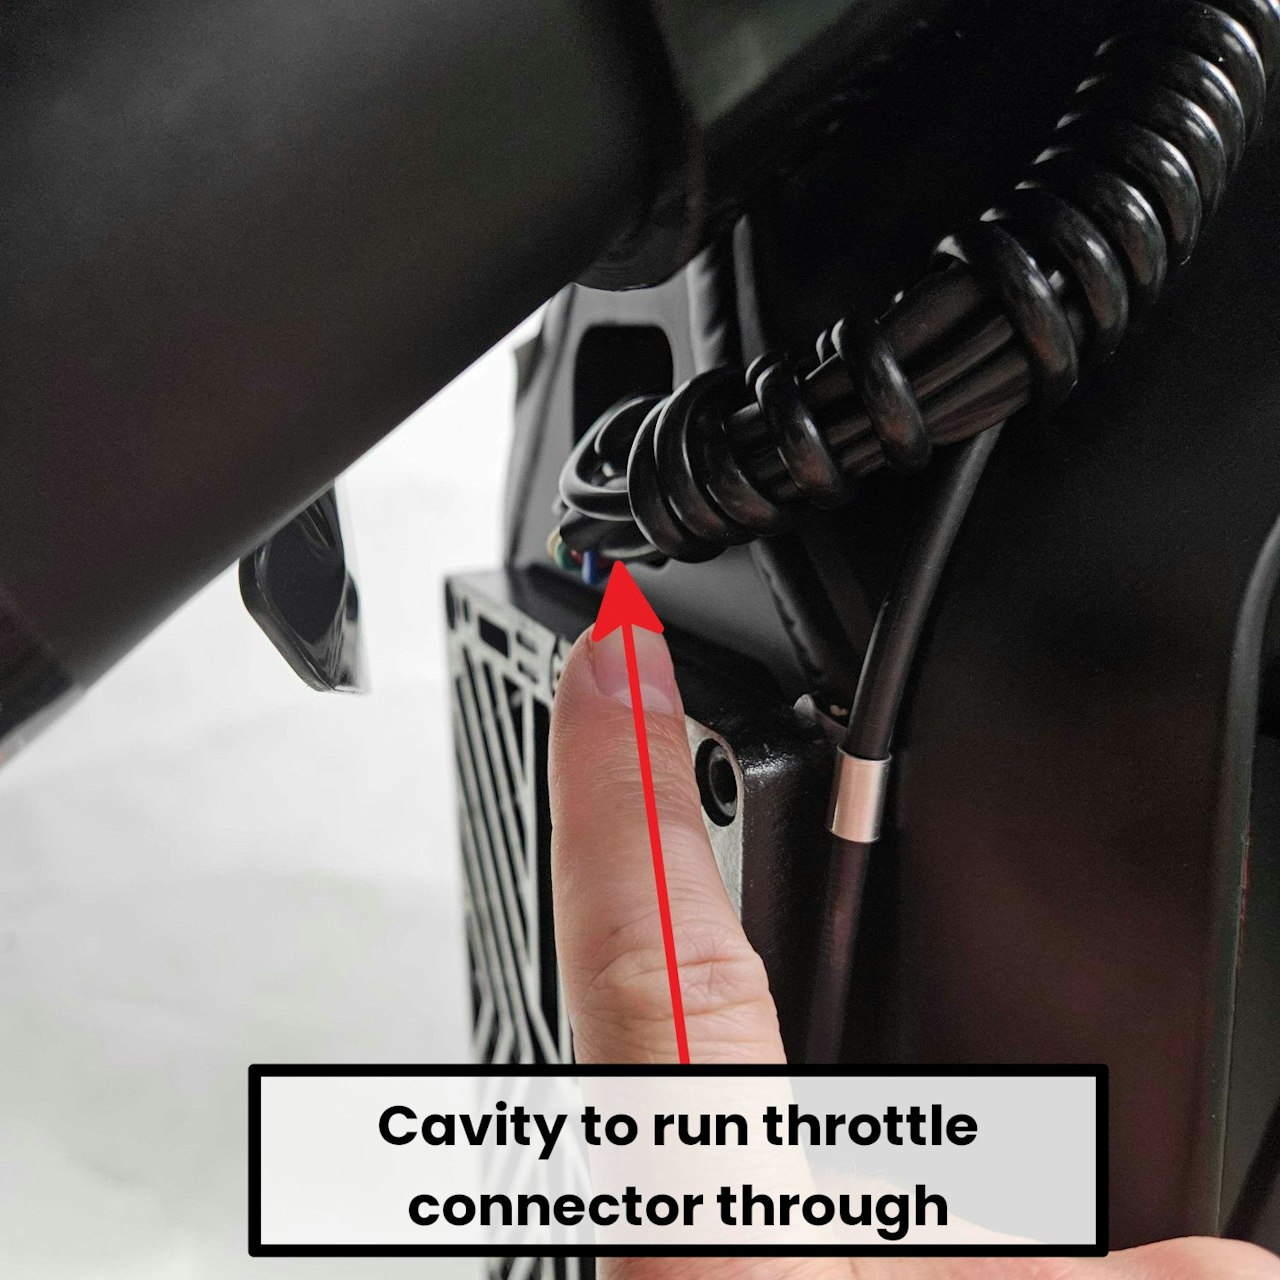
Gently thread the throttle wire and connector out from the wiring cavity of the bike
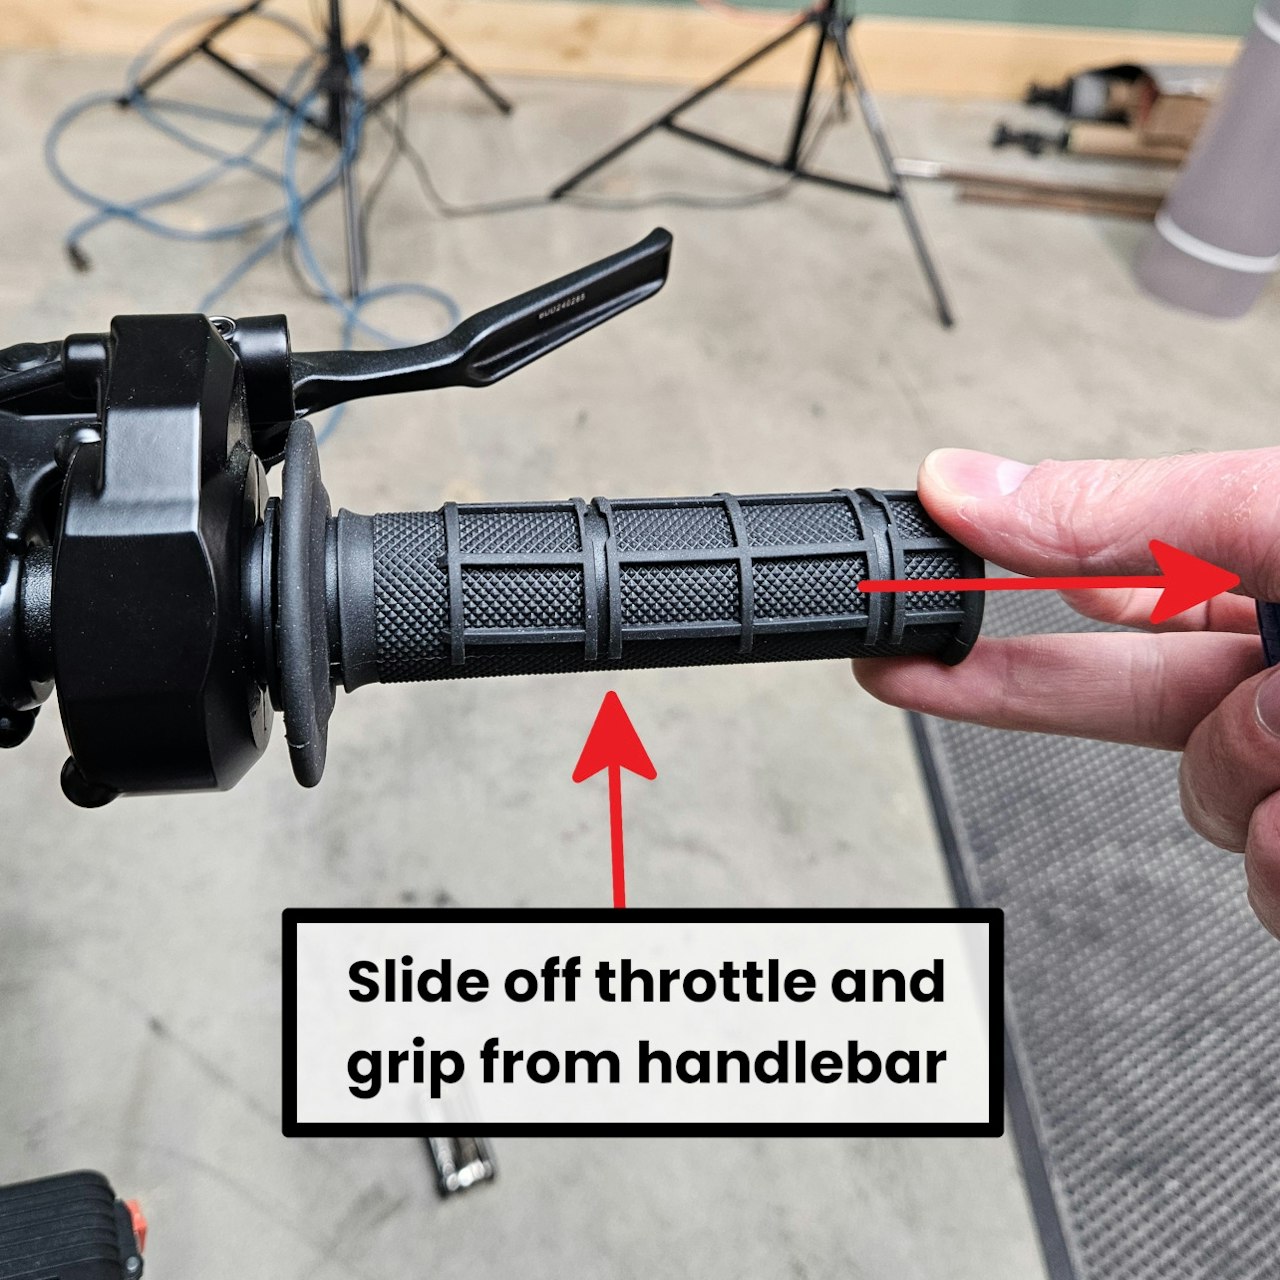
With the bolts loosened and the connector removed from the insides of the wiring cavity, you should be able to slide the throttle off from the handlebars
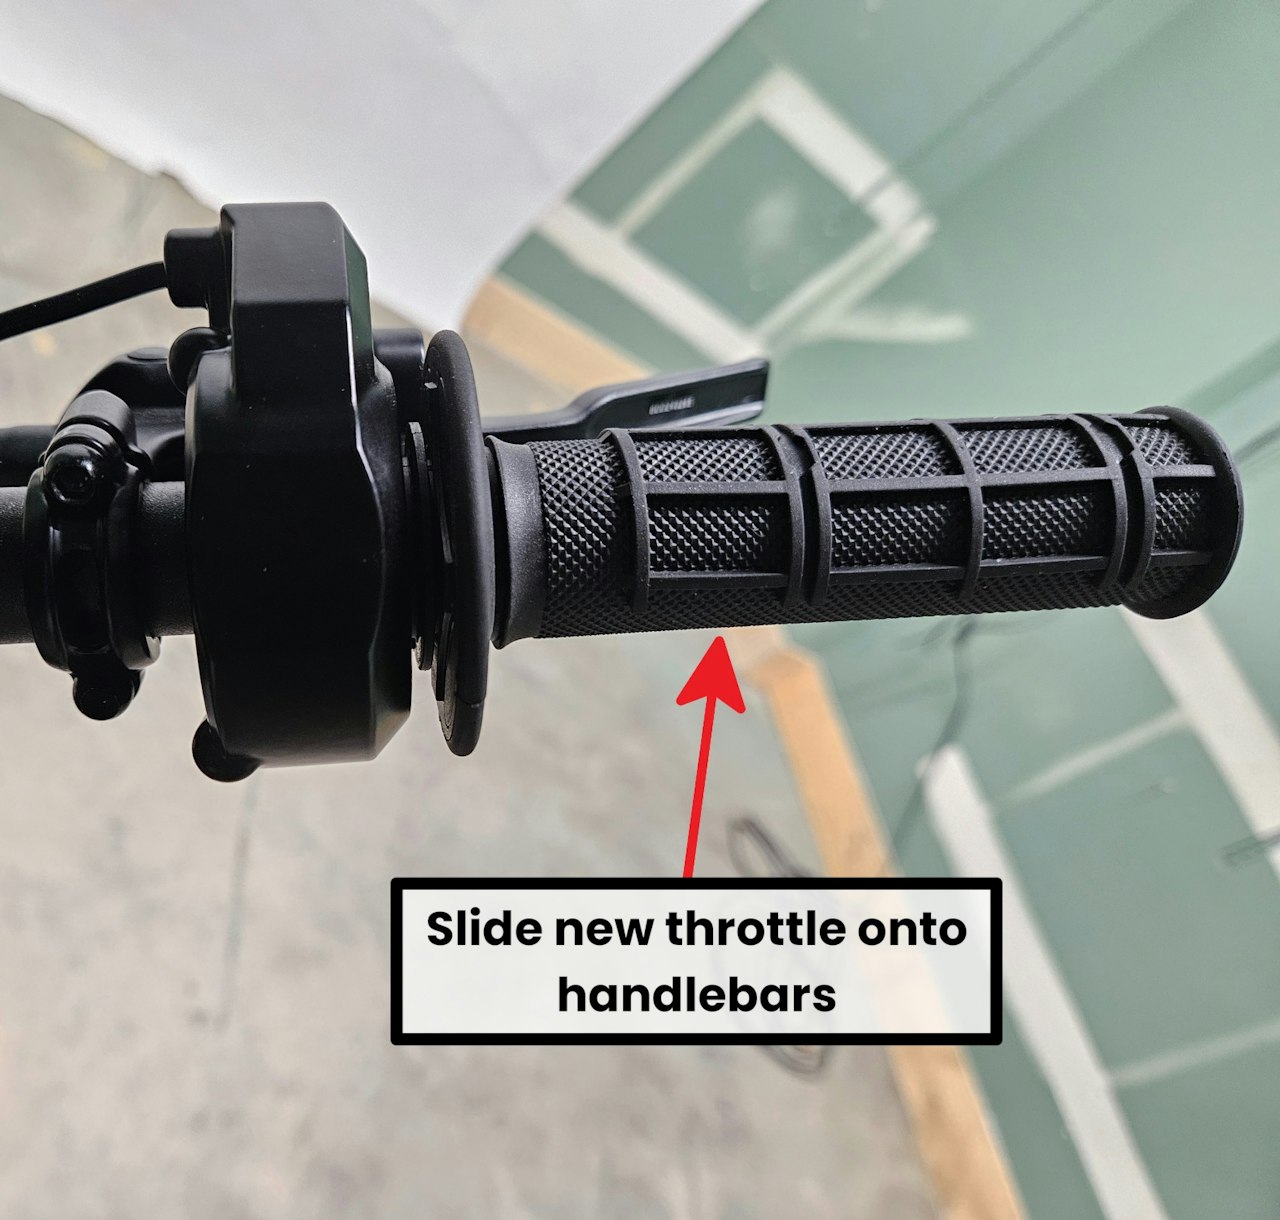
Take your new throttle and slide it onto your handlebars. Slightly tighten the bolts on the throttle and the brake lever that you previously moved - do not fully tighten them yet, as there are final adjustments to be performed later.
Thread the connector back into the frame, reversing the process you followed to remove it!
Plug the male-ended connector for the new throttle into the wiring cavity, ensuring the connector is correctly oriented.

Step 6
Reposition the wires and connectors to be back within the wiring cavity as they were before installing the new throttle.
Move the "Controller/Electronics" cover back into position where it originally was located.
Reinstall the 6 screws to secure the "Controller/Electornics" cover back into position.
Reinstall the conduit wire cover over the wires exiting the wiring cavity

Step 7
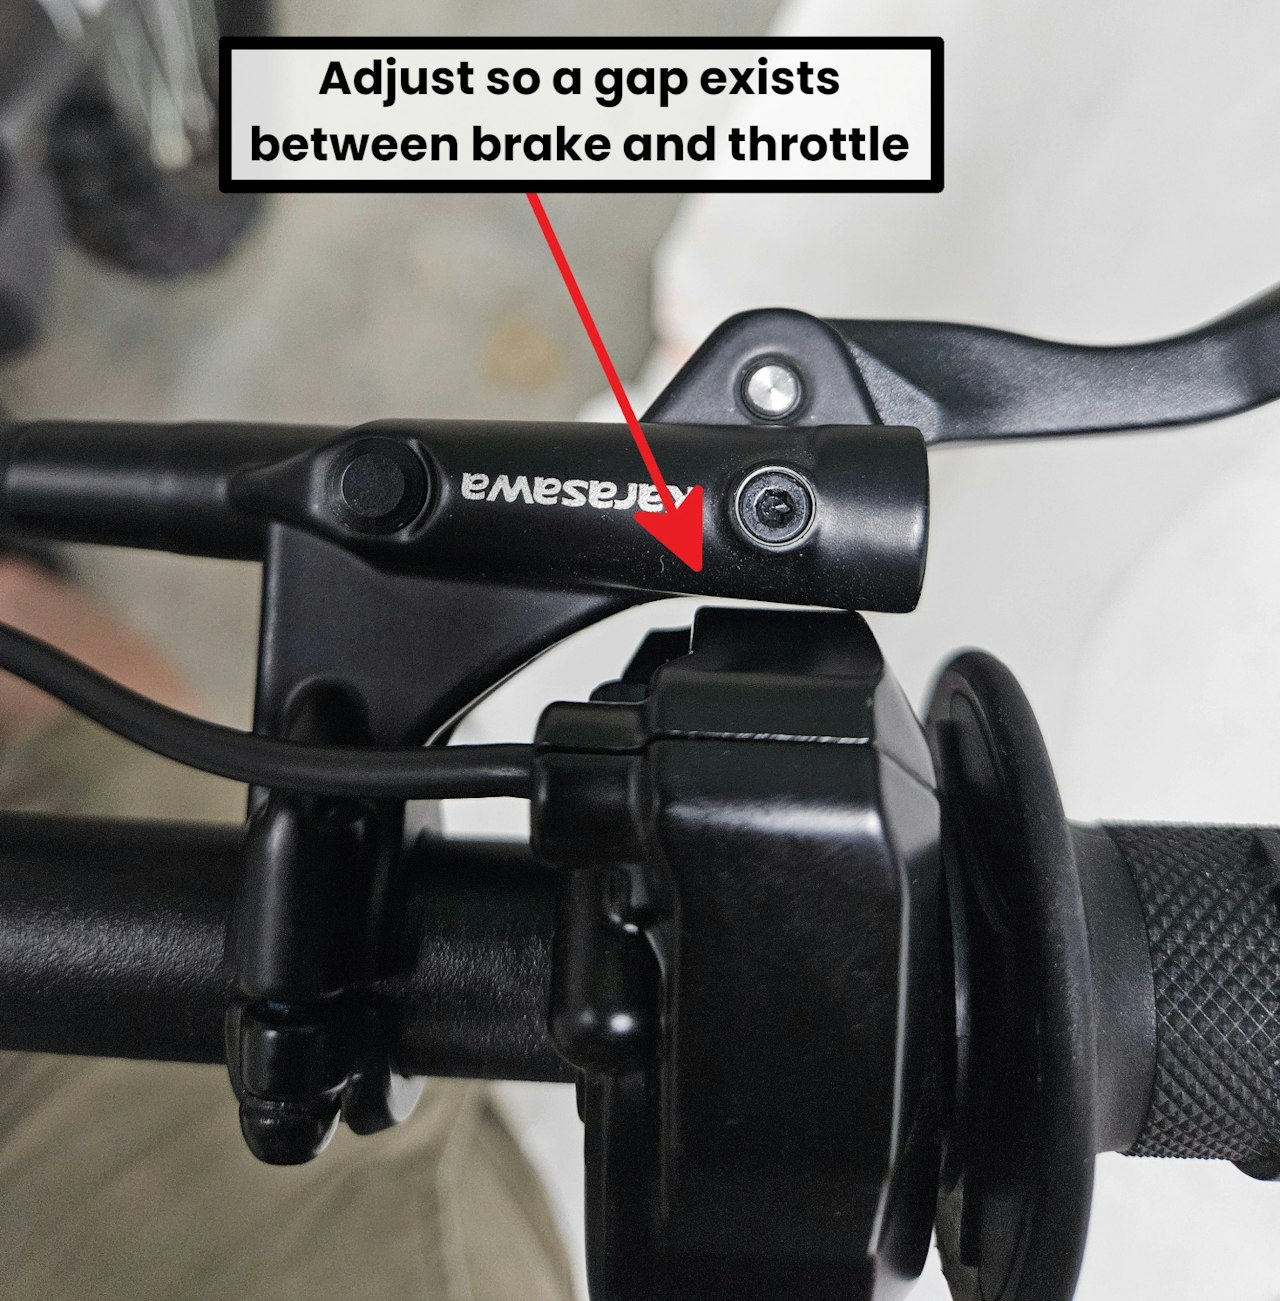
Return to the throttle and brake lever. Tighten each with the 4mm Allen Key - ensuring there is a slight gap inbetween the Brake and the THrottle as shown in the first image.
Check that the throttle returns to neutral when twisted as shown in the second image here.
If the throttle does not return to neutral you may need to SLIGHTLY loosen the bolts on the throttle handle. Repeat until you find the sweet spot of a throttle firmly attached to the handlebars that also rebounds when released.
You have now replaced the throttle on your BTX Moto and are ready to return to riding!

